Purchase
To purchase dProB, visit the License Management. Before you can buy a license, you need to create a dProB account. This account can be used for all dProB services, including the forum and support.
Purchase steps:
- Create an account: Register on the License Management page and confirm your email address using the link in the confirmation email.
- Open the license panel: After verification, you can access the license panel.
- Purchase a license: In the license panel, click “Buy” to start the purchase process.
- Complete payment: Follow the instructions to complete the payment.
- Check your license: After successful payment, the license panel will show that you now have a valid license.
Note: Your dProB account gives you access to all dProB services. Keep your login credentials safe!
Installation and first launch
Once you have purchased a valid license, you can download and install dProB.
Installation steps:
- Download: The installation file (.exe) is now available for download in the license panel. Download it to your computer.
- Start installation: Run the downloaded .exe file. Your operating system may display a security warning. Confirm it to continue with the installation.
- Complete installation: Follow the installation wizard’s instructions to finish the installation.
- Launch the program: After successful installation, you can start dProB.
- Log in: Log in to the program using your dProB account.
- Get started: You are now ready to work with dProB and create your first projects!

Program overview
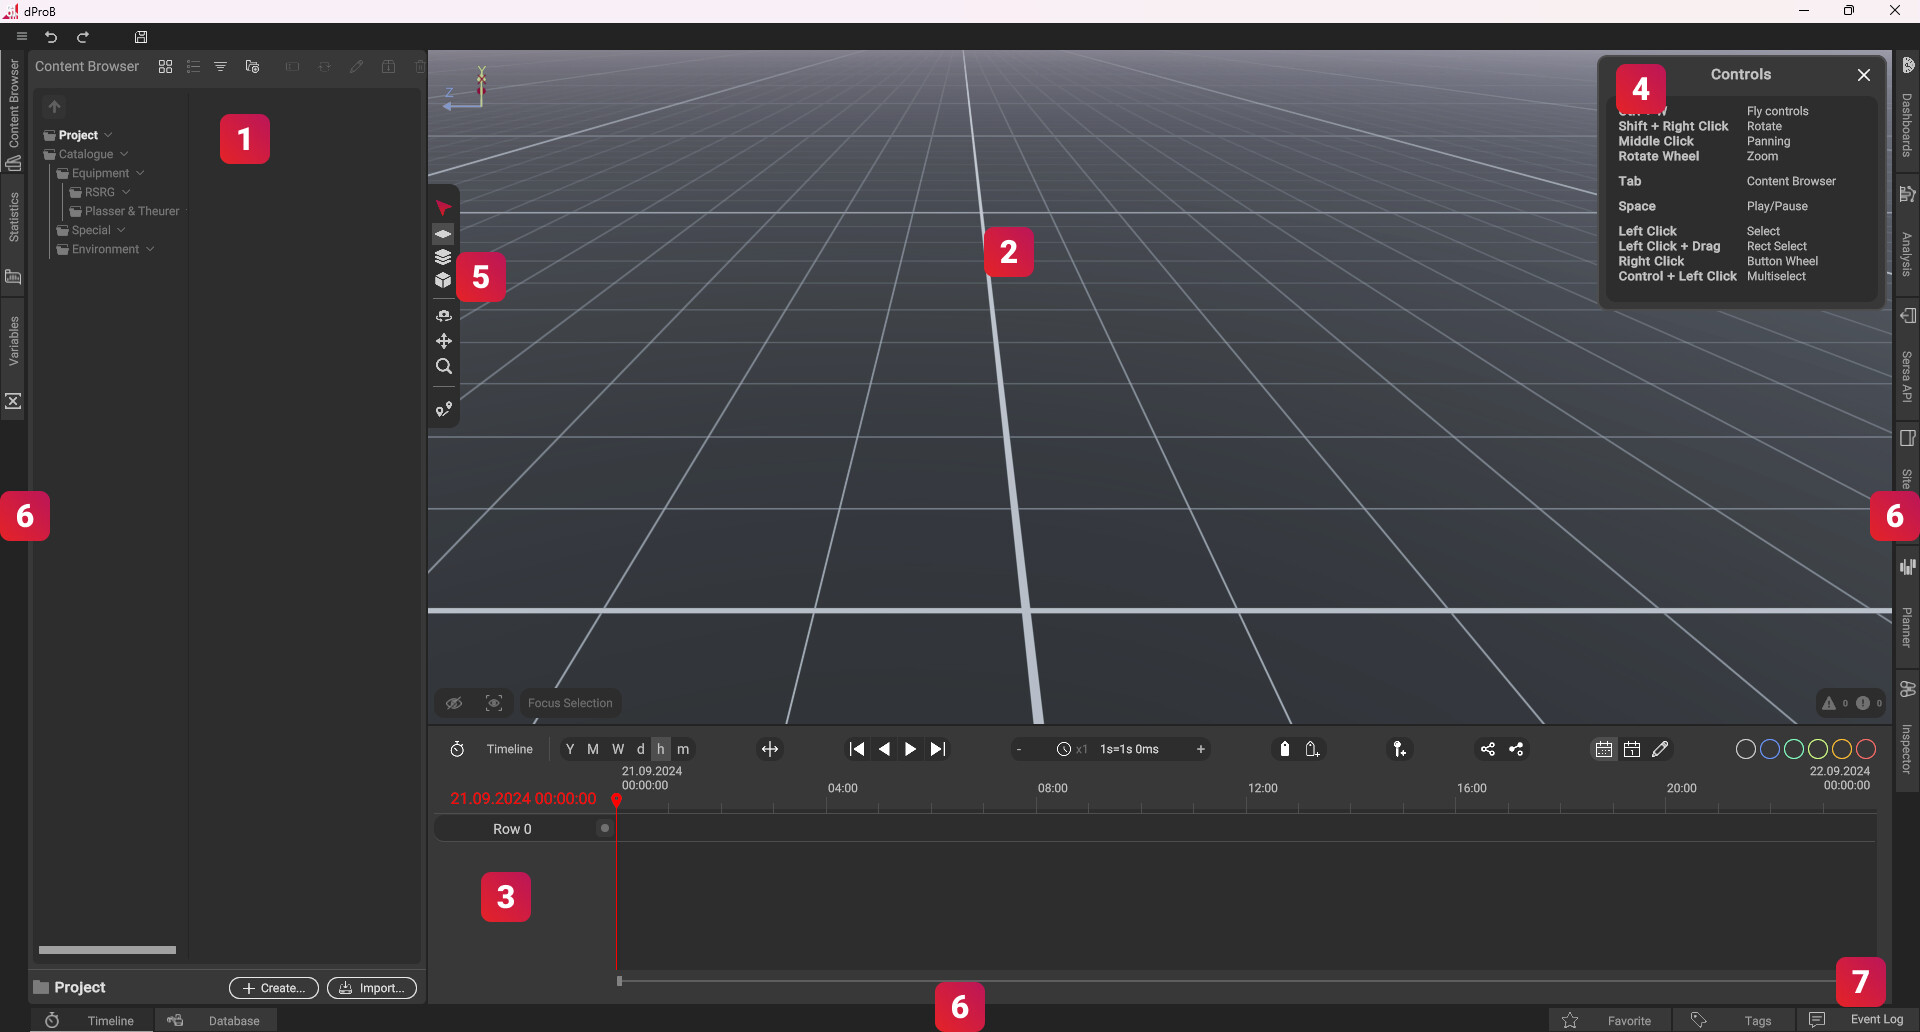
1. Content Browser
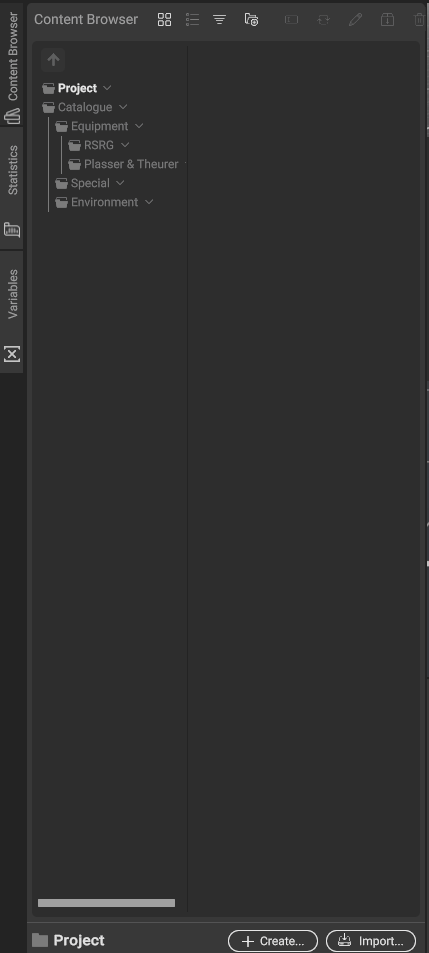
You manage all your files through the Content Browser. The “Project” folder contains all files that you imported using the import button. The “Catalogue” is a library containing ready-made models and functions that you can use directly in your process planning.
2. 3D World
In the main application window, you can see the 3D World, where you import your models and plan processes.
3. Timeline
The Timeline is a time axis where all processes are listed over time. Processes can be played back and moved from here.
4. Info
The Info window displays the controls for the current camera mode and the currently selected tool.
5. Tools
The toolbar is docked at the edge of the 3D World and allows you to quickly switch between the required selection and movement tools.
6. Side tabs
At the edges of the program, you will find additional function windows that you can expand and collapse as needed. You can also move them within the bar using drag and drop, allowing you to easily customize the user interface to your needs.
7. Status messages
All warnings and errors are displayed here. If any appear, you can jump directly to the error from there.
Importing a model
Importing the model
For process planning, you first need an environment in which you can work. Use the Import button in the Content Browser to select the desired IFC model (.ifc) from your file directory.
Placing it in the 3D World
After the import, the model appears in your Content Browser under Project and is ready to be placed in the 3D World. There are two ways to do this:
- Double-click the model
- Drag and drop it into the 3D World
Once the model has been placed in the 3D World, the Guidance menu opens automatically, where you can select the model’s georeference. Select the “from Model” option here. In the next step, there are different ways to import the model. Select the “Existing” option. You have now successfully imported your first model into dProB! ![]()
Navigating in 3D
To keep an overview of your environment and processes in the 3D World, there are two types of navigation: the Orbit Camera and the Flight Camera.
The Orbit Camera allows fast and flexible navigation within the 3D World. By contrast, the Flight Camera is especially useful for more precise control, as you can move along the axes.
Here is an overview of the keyboard controls:
| Command | Orbit Camera | Flight Camera |
|---|---|---|
| Switch camera mode | Ctrl + W | Ctrl + W |
| Move camera | Middle mouse button | W + A + S + D |
| Move camera up/down | Middle mouse button | Q + E |
| Zoom | Mouse wheel scroll | Mouse wheel scroll |
| Look around | - | Middle mouse button |
| Rotate around a point | Shift + right-click | - |
Siteviewer
The Siteviewer gives you an overview of all models that you have placed in your 3D World. Overall, the Siteviewer provides three basic functions:
- Maintaining an overview
- Arranging and grouping objects
- Selecting objects
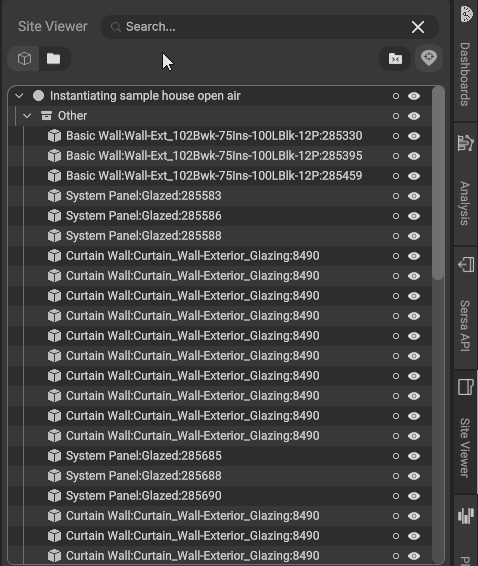
Maintaining an overview
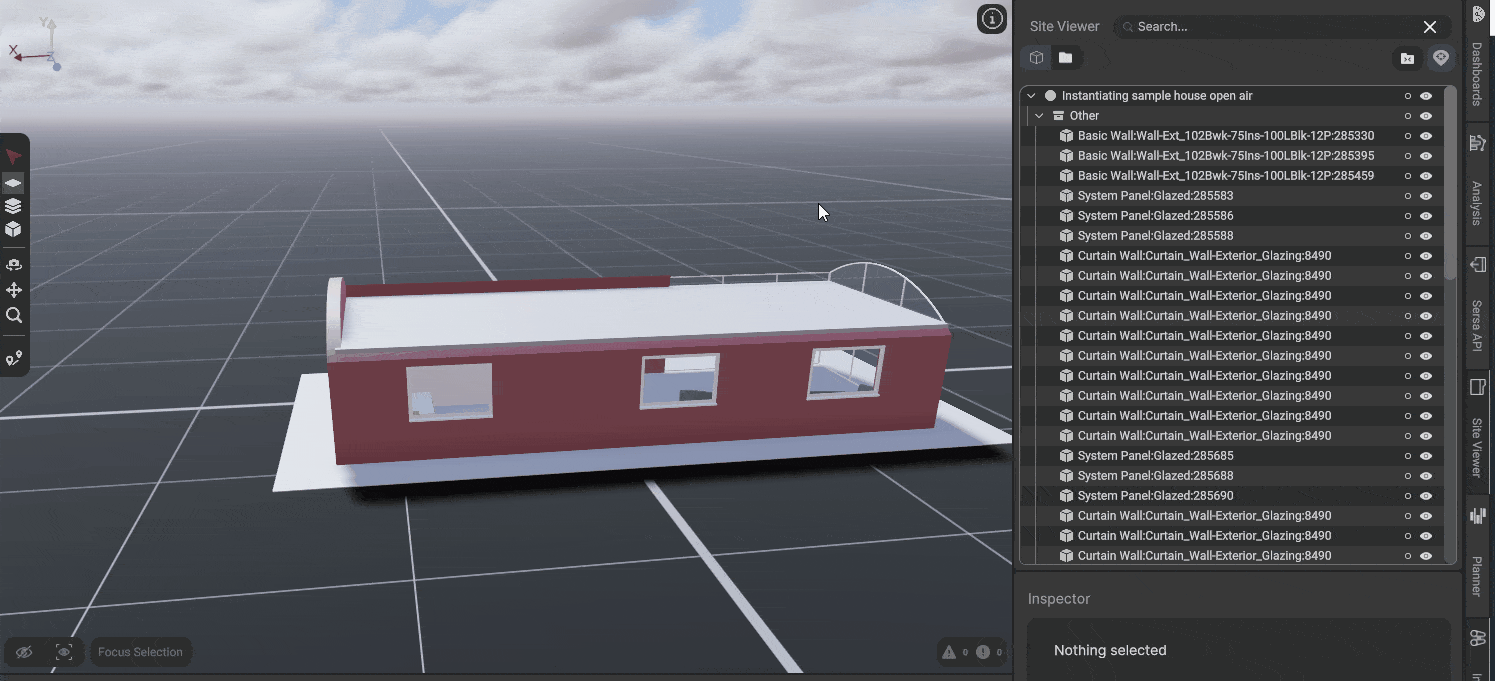
When you expand a model, the “Other” level opens beneath it, listing all individual parts of the respective model. Each level in the Siteviewer can be shown or hidden using the eye icon, or viewed in isolation using the circle icon. This means you can isolate and hide entire models as well as specific individual parts of a model, such as the side wall shown here.
Arranging and grouping objects
Models and their individual parts are automatically sorted into the generated hierarchy structure. Alternatively, you can create your own hierarchy structure. To do this, switch to “Custom Grouping Mode” by clicking the folder icon next to the 3D cube icon. There, objects can be arranged freely in the list using drag and drop. To group objects, they first need to be selected. You can then click the plus icon to create a new folder containing the selected objects directly. Alternatively, you can use the plus icon to create a new folder and drag objects into it.
Process planning
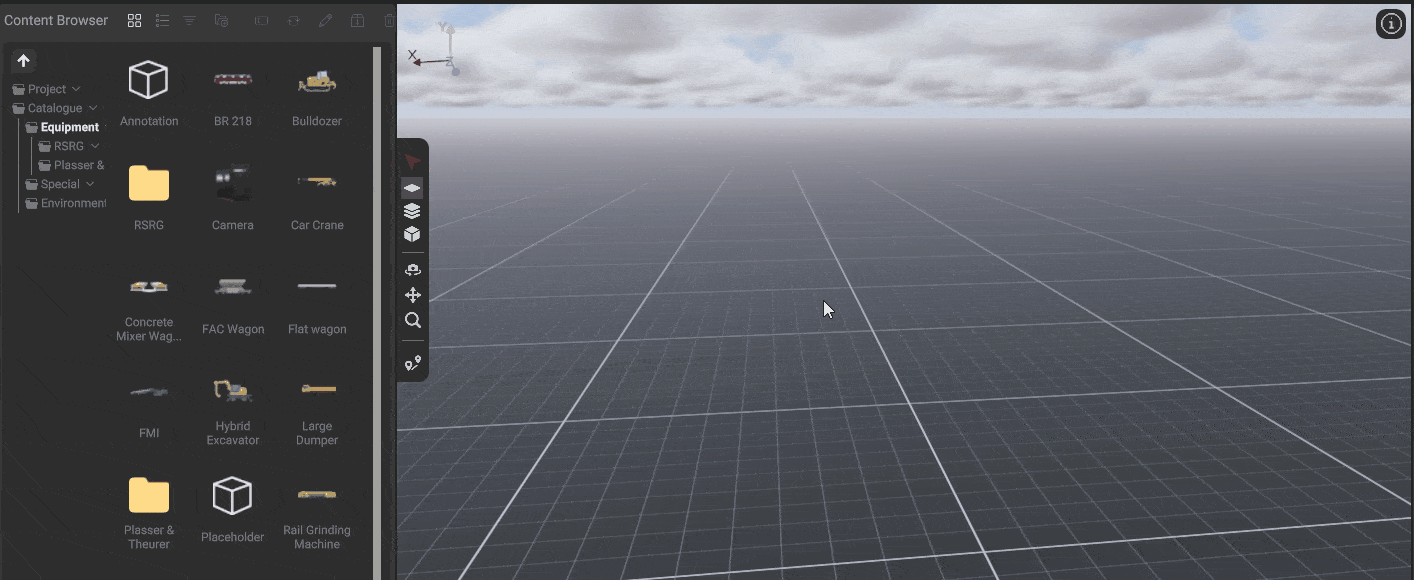
To plan a process, you first need to place a vehicle or machine in the 3D World. To do this, open the Equipment subfolder in the Catalogue folder and drag the “Car Crane” vehicle into the 3D World. You can confirm the truck’s position with a left-click. Right-clicking the vehicle opens a radial menu listing all possible actions for the vehicle, such as “Drive” represented by the steering wheel icon. When you select the “Drive” option, a green preview of the vehicle appears at your cursor, and you can define the position to which the truck should drive by left-clicking at the desired location.
You have now successfully planned your first process! ![]()
Timeline
Planned processes can be played back in the Timeline using the space bar. The red line shows your current position on the time axis.
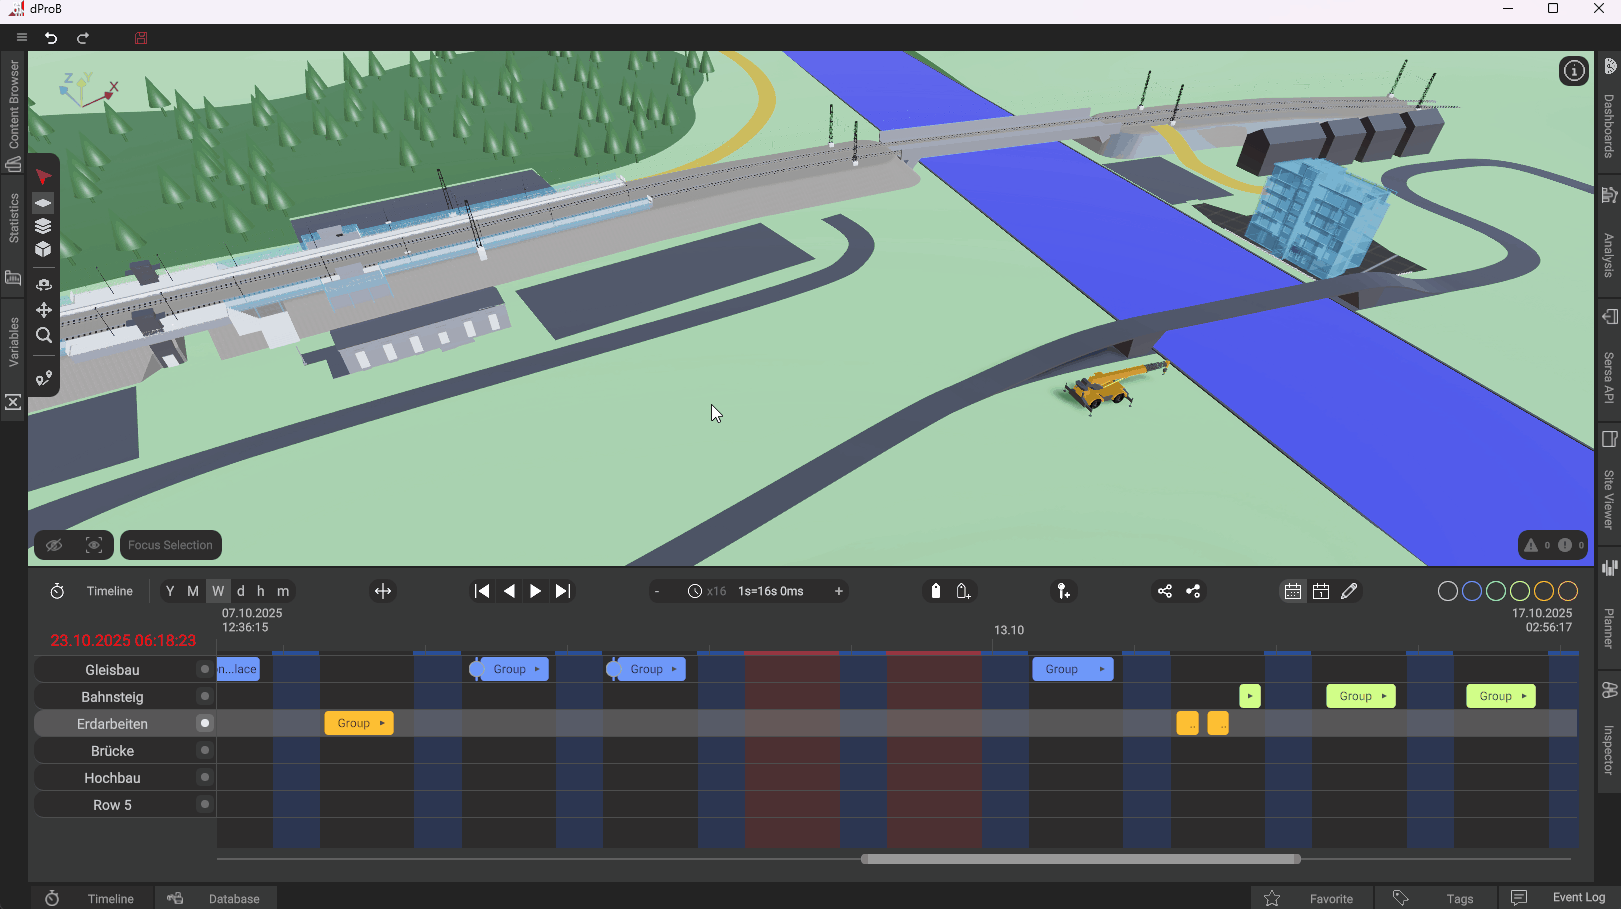
Processes

Each process is assigned to a row by default and is displayed as a bar. To move the process on the Timeline, simply drag and drop the desired bar to the desired position.

When you drag one process onto another process, they are automatically grouped together. You can expand the group with a left-click to see the individual processes.
If you want to highlight a row, click the circle icon to the right of the row name.
Controls

To keep an overview of all processes, you can dynamically adjust the displayed time window by changing the zoom level.
| Command | Keyboard shortcut |
|---|---|
| Adjust zoom level | Ctrl + scroll on the Timeline |
| Move time window left/right | Scroll directly on the time axis |
The upper bar of the Timeline contains additional control and customization options:
- Preset zoom levels
- Standard playback functions
- Playback speed
- Show/hide and add milestones
- Show/hide manual process dependencies
- Show/hide and edit calendar
- Process coloring
Editing a process
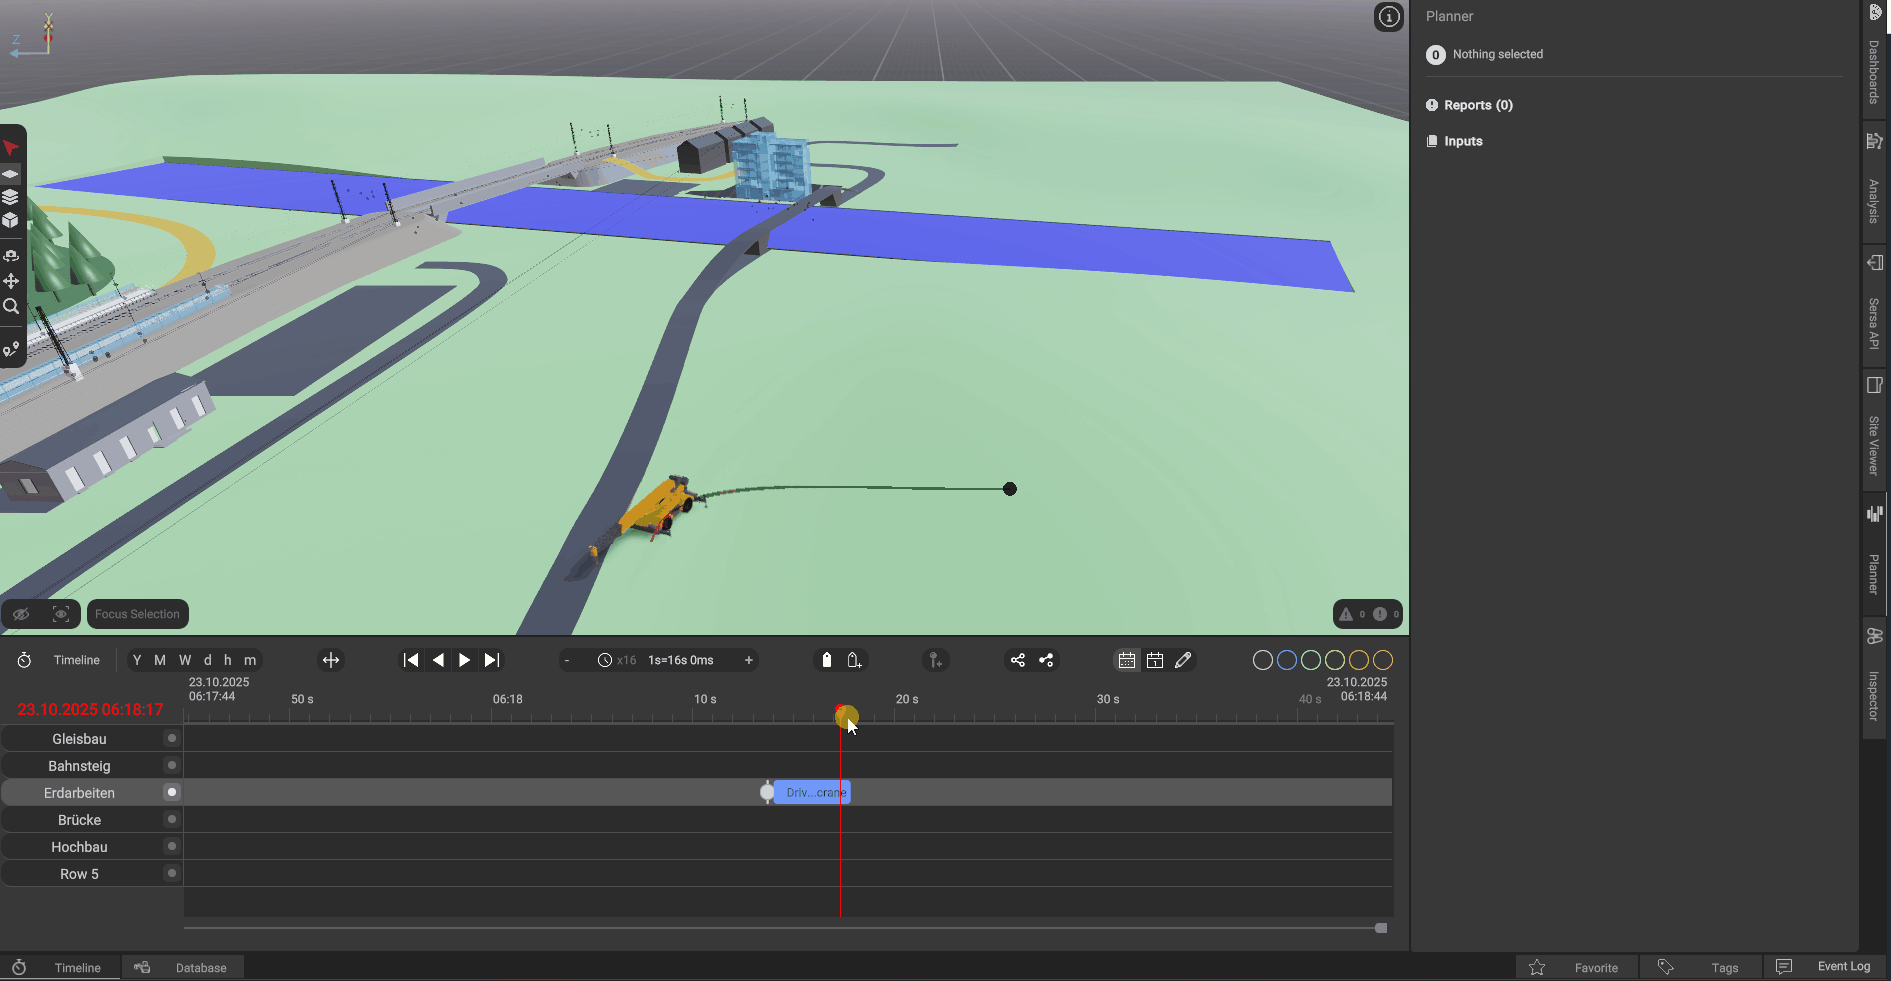
To edit an already planned process, you need to expand one of the side tabs called “Planner” on the right edge of the program. You can then select the desired process in the Timeline, and all information about the process will be displayed in the Planner.
Depending on the process, there are different adjustment options. Some require new values, while others let you choose from different options in a dropdown menu to modify the process.
Now select the drive process you previously planned and, under “Target Location”, press the button with the cursor icon to adjust the new target location by clicking in the 3D World. When the vehicle appears in green at your cursor and the 3D World window has a yellow border, you can reposition your vehicle in the 3D World. By confirming the new position with a left-click, you have successfully edited a process.
Saving & loading
Saving your file is very simple: use the keyboard shortcut Ctrl + S or click the floppy disk icon in the upper-left corner of the program.
To open the main menu, click the hamburger menu in the top-left corner of the program. There, you can also save your project or use “Load” to open another project file from your file directory. The home icon takes you to an overview of your recently used projects. From there, you can also create a new project.
Congratulations! You have successfully completed your first steps with dProB and finished the quickstart guide. ![]() If you want to dive deeper into using dProB, we recommend taking a look at the Deep Dive. There you will find detailed explanations of the program’s many features. Have fun exploring!
If you want to dive deeper into using dProB, we recommend taking a look at the Deep Dive. There you will find detailed explanations of the program’s many features. Have fun exploring! ![]()
Best regards,
Your dProB Team